- By Camila Ante

Facebook is a great tool for you to showcase your products or services and attract potential customers to your brand. However, as other platforms demand, it needs you to constantly post; that you "feed" it to keep users on your platform.
We know that due to meetings, business or reports, it is impossible to be attentive to social networks all day, so the best way to keep them active and with new content is to schedule your publications.
That is why throughout this article we will give you the appropriate tools so that you learn to schedule posts on Facebook effectively and without complications.
1. Enter Creator Studio
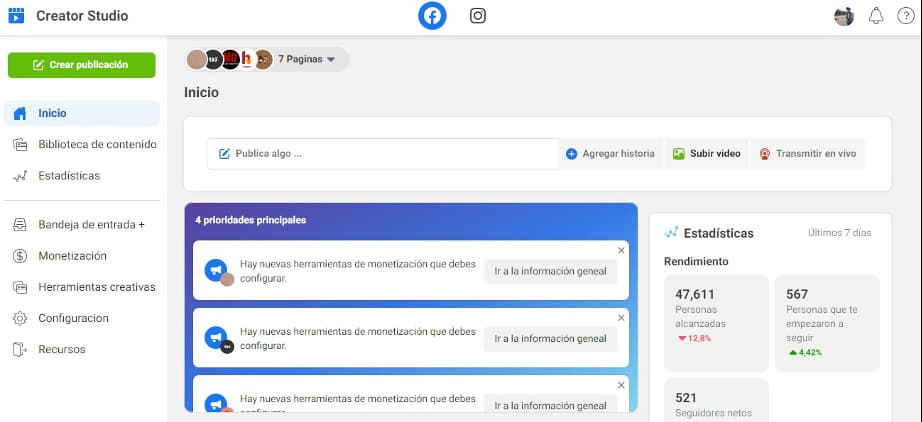
You may not be that familiar yet, but Facebook has a platform called Creator Studio. In it you can see all your accounts, from personal to the pages you manage. Previously you could schedule publications from the main page of your Facebook account, but the interface changed this and now you need to go directly to the Creator Studio, once inside you can follow the other steps that we will show you below.
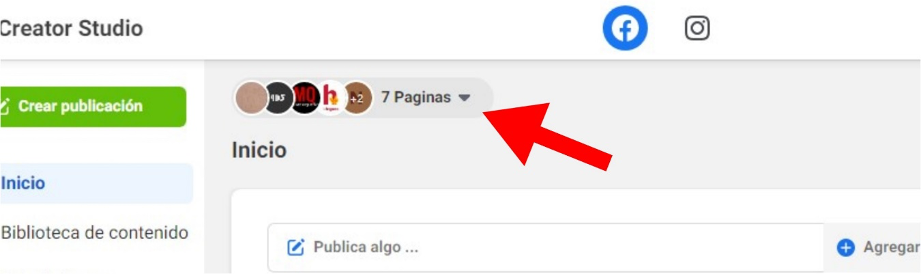
2. Select your account
At the top left you will see a tab that says "All Pages". Here Facebook makes a list of all the pages you have created and your personal account. Select the page where you want to publish the posts.
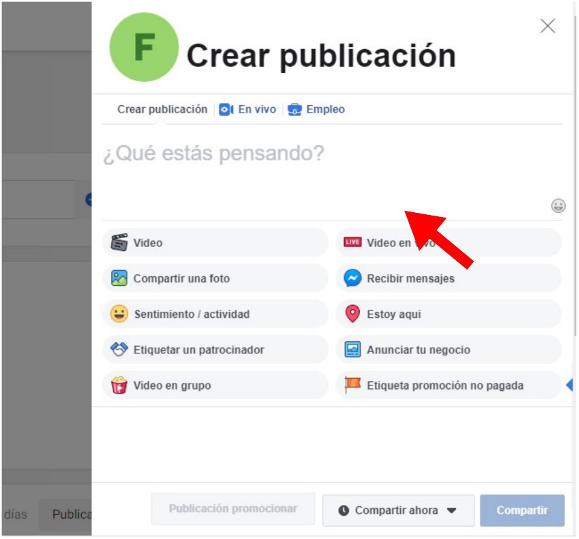
3. Create your post
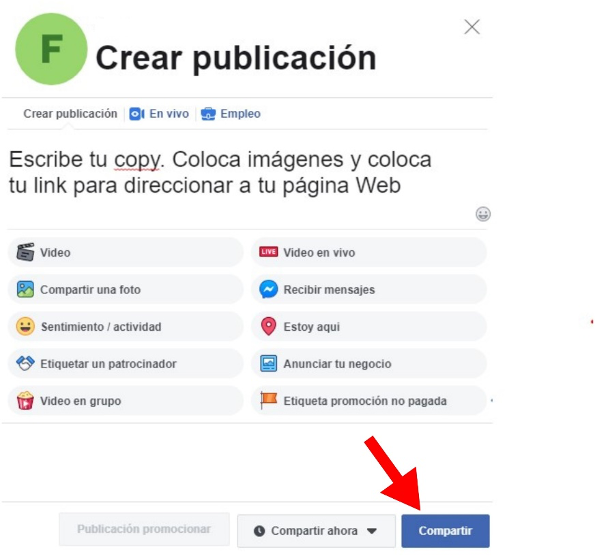
In the Facebook interface you have the button «Post something», click there and a new window will open. Put what you want to include in your publication.
Write creative copy. Place the images that you consider necessary or add a link to direct, through the featured image, to your web page, so that when they click it will open another tab to the main page.
Note: if you include images and a link, the card will not appear as the space is already occupied by the photographs.
4. Schedule your post
Once the entire creative process is done, go to the "Publish" button. Here you have an option which has "Share now" selected, select the tab to display various options.

Select the "Schedule" option that will appear in the menu and when you see the box where you must specify the date and time you want your content to be published, choose the necessary information.
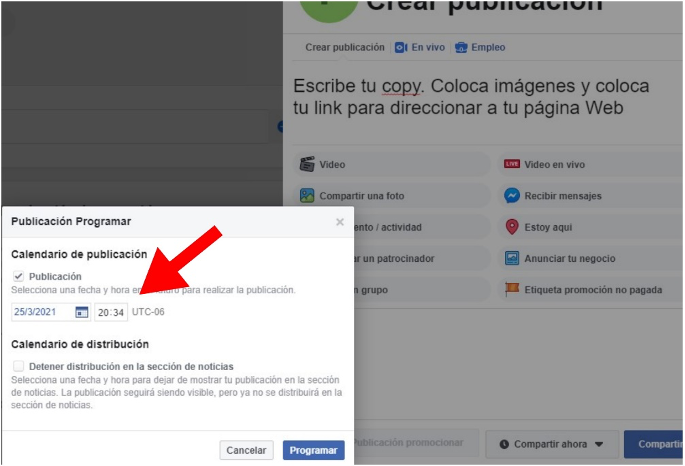
If you want to promote an event with a deadline, select the "Stop distribution in the news section" box so that you can also schedule a time and date for your publication to stop being displayed in the news section. Finish entering your date and time and press the "Schedule" button.
5. Select "share" to finish scheduling your new content
At the end of this process and check that the information is correct, click on the "Share" button and your publication will be scheduled for the date and time you have indicated.
Ready. You already know how to schedule posts on Facebook.
If you want to publish and schedule a video, the steps to follow are similar. In any case, we will mention them below.
How to schedule a video on Facebook?
1. Upload your video
Select the "Upload video" option that you have at the beginning of your Creator Studio.
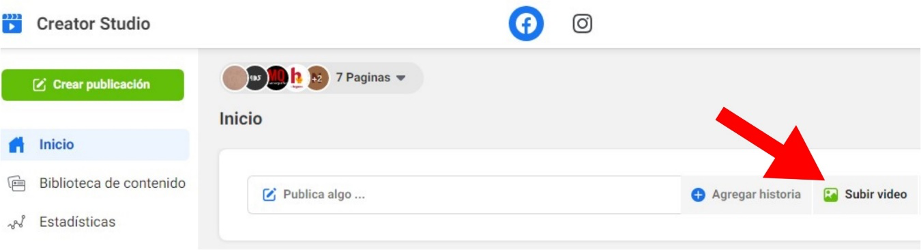
The platform offers you the options: upload a single video, upload several videos or upload a video on different pages (to schedule posts in Facebook groups). Choose the option you require.
2. Choose your video and fill in the information boxes
After selecting any of the video options mentioned above, you must choose the video you want to upload. Select and click "Open."
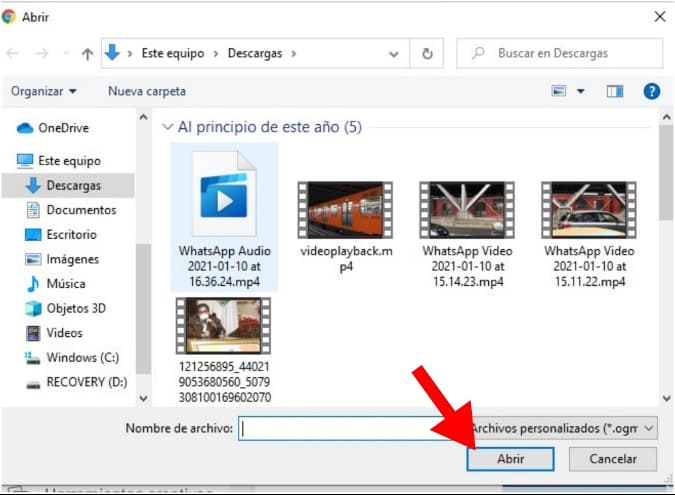
You have to wait a certain time for the video to be uploaded to the platform. While you wait, fill in the information boxes requested by the platform.
The Creator Studio asks you for a title for your video, it looks for the name you give it to be related to its content; you have another box for the description to place your copy. As in the other publication option, you can place a link to direct them to your web page, only this will not enable the card, since the video is the one that occupies that space.
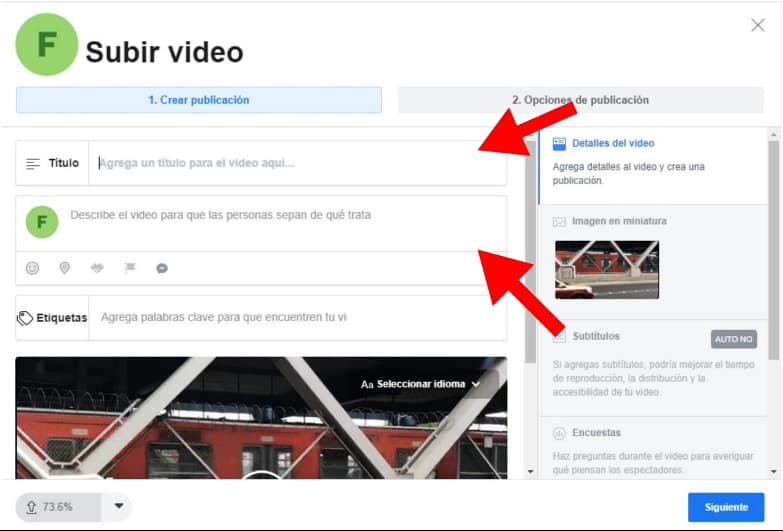
In this window you can select the thumbnail image you want for your video or if you want to apply subtitles to retain more of your audience. If you want, you can add them.
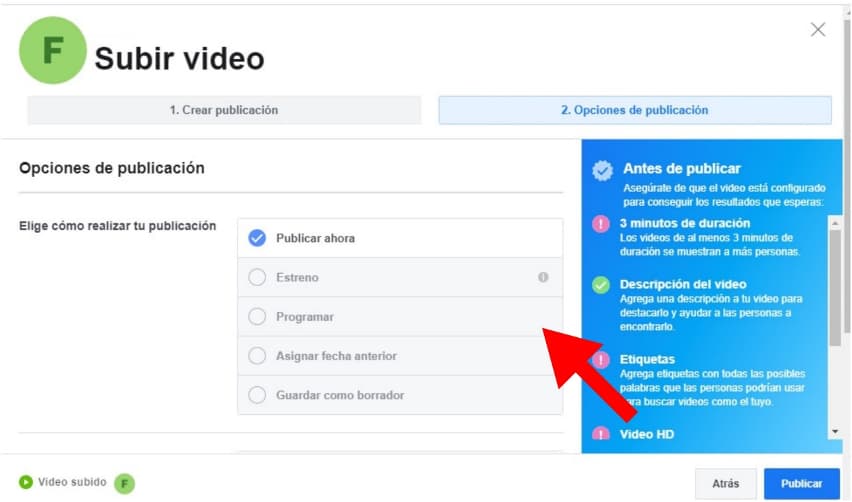
3. Schedule your video
At the end of uploading your video, press the «Next» button and go to the final part. At this point, the Creator Studio displays the different options: choose the "Schedule" tab and enter the date and time you want your publication to appear on your Facebook page. In the same way, you have the option for this publication to have an end date and stop being seen in the news section after a while.
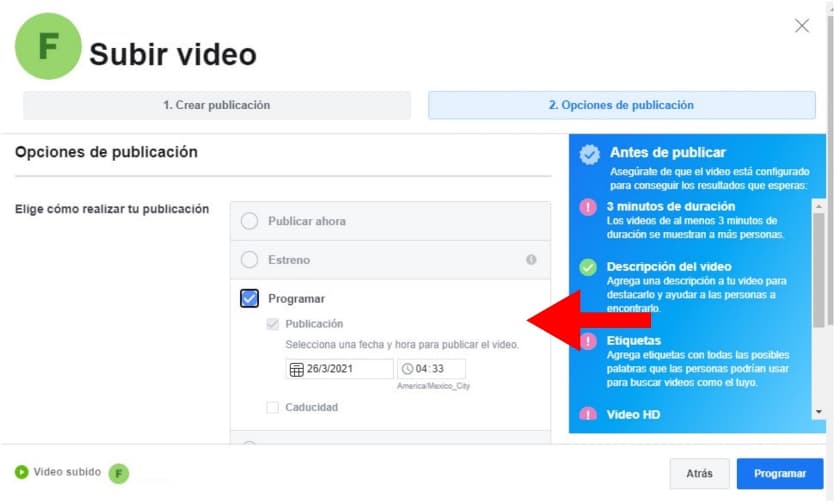
After selecting your date and time, post your video and it will be scheduled to come out at the time you selected.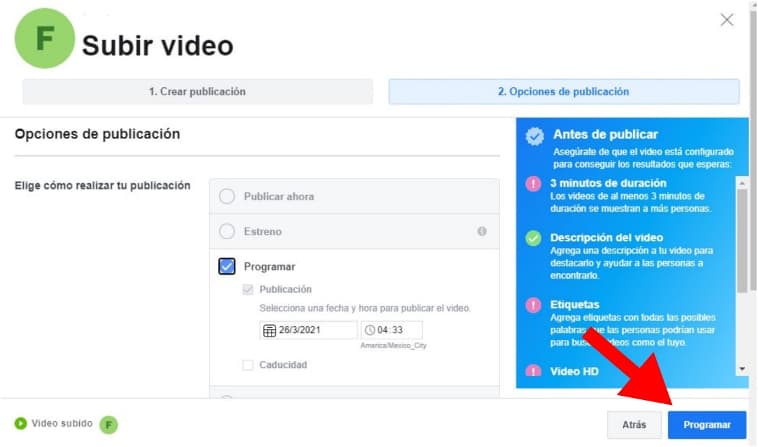
This is the final step, the next thing will be to check that the data of your programming is correct and wait for the day to arrive to monitor how the audience reacts to your content.
If you want to learn another item from your social networks to enhance your platforms and adapt them to the market, let us know!
Source: Hubspot.es
